#pdksh 설치 파일은 yum 지원을 안해서 wget 으로 다운 rpm 으로 설치
# /usr/bin/ksh 파일이 서로 충돌 해서 --force 스위치 줌
rpm -Uvh --nodeps --force pdksh-5.2.14-30.x86_64.rpm
Sys/oracle
System/oracle
-설치전 준비사항-
Oracle 11gR2를 설치하기 전에 설치파일을 미리 준비해 두도록 한다.
-설치파일 다운로드-
다운로드 경로 : http://www.oracle.com/technetwork/database/enterprise-edition/downloads/index.html
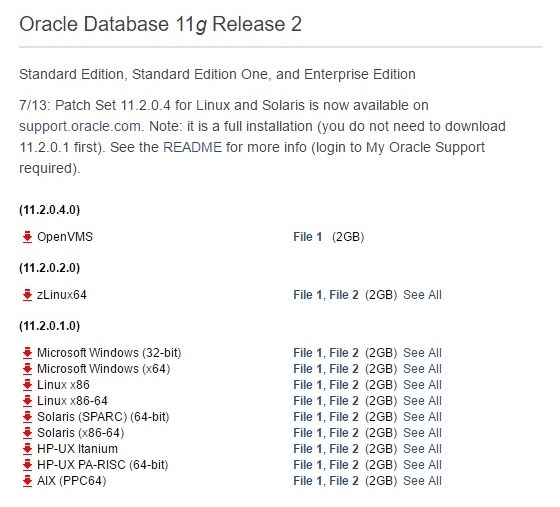
경로 하단에 자신의 OS에 맞는 설치파일을 받아 설치를 진행 할 수 있다
설치파일을 다운로드 받기 위해서는 ORACLE에 회원가입을 해야 받을 수 있다.
이번 에서는 CentOS 64bit에 설치 할 예정이므로 Linux x86-64 설치파일(File1, File2)를 받아서 진행한다.
-설치 시작-
1. 의존 라이브러리 설치
| yum -y install compat-libstdc++-33.x86_64 binutils elfutils-libelf elfutils-libelf-devel yum -y install glibc glibc-common glibc-devel glibc-headers gcc gcc-c++ libaio-devel yum -y install libaio libgcc libstdc++ libstdc++ make sysstat unixODBC unixODBC-devel yum -y install unzip wget ftp://ftp.pbone.net/mirror/www.whiteboxlinux.org/whitebox/4/en/os/x86_64/WhiteBox/RPMS/pdksh-5.2.14-30.x86_64.rpm rpm -Uvh --nodeps pdksh-5.2.14-30.x86_64.rpm |
혹 yum 명령어가 수행되지 않는다면 아래 경로에서 사용할수있도록 설정 할 수 있다.
yum 실행 안될때 : http://anyinstaller.tistory.com/1
| [root@server1 ~]# yum -y install compat-libstdc++-33.x86_64 binutils elfutils-libelf elfutils-libelf-devel Loaded plugins: refresh-packagekit, security Setting up Install Process Package compat-libstdc++-33-3.2.3-69.el6.x86_64 already installed and latest version Resolving Dependencies --> Running transaction check ---> Package binutils.x86_64 0:2.20.51.0.2-5.36.el6 will be updated ...... Complete! |
실행 구문 마지막에 Complete 출력으로 설치가 정상종료됬는지 확인한다.
2. 설치 전 파라미터 및 유저 리소스 설정
아래와 같이 커널 파라미터값을 설정하여준다. 값이 없는 경우에는 추가하여준다.
| [root@server1 ~]# vi /etc/sysctl.conf |
[/etc/sysctl.conf]
| .... # Controls the maximum shared segment size, in bytes kernel.shmmax = 68719476736 # Controls the maximum number of shared memory segments, in pages kernel.shmall = 10523004 kernel.shmmni = 4096 kernel.sem = 250 32000 100 128 fs.aio-max-nr = 1048576 fs.file-max = 6815744 net.ipv4.ip_local_port_range = 9000 65500 net.core.rmem_default = 262144 net.core.rmem_max = 4194304 net.core.wmem_default = 262144 net.core.wmem_max = 1048586 |
변경 후 커널 파라미터값을 적용시킨다.
| [root@server1 ~]# /sbin/sysctl -p net.ipv4.ip_forward = 0 net.ipv4.conf.default.rp_filter = 1 net.ipv4.conf.default.accept_source_route = 0 kernel.sysrq = 0 kernel.core_uses_pid = 1 net.ipv4.tcp_syncookies = 1 kernel.msgmnb = 65536 kernel.msgmax = 65536 kernel.shmmax = 68719476736 kernel.shmall = 10523004 kernel.shmmni = 4096 kernel.sem = 250 32000 100 128 fs.aio-max-nr = 1048576 fs.file-max = 6815744 net.ipv4.ip_local_port_range = 9000 65500 net.core.rmem_default = 262144 net.core.rmem_max = 4194304 net.core.wmem_default = 262144 net.core.wmem_max = 1048586 |
유저의 자원 사용 제한값을 설정한다.
| [root@server1 ~]# vi /etc/security/limits.conf |
| ..... oracle soft nproc 2048 oracle hard nproc 65536 oracle soft nofile 1024 oracle hard nofile 65536 |
SELINUX 설정을 해제한다.
| [root@server1 ~]# vi /etc/selinux/config |
| # This file controls the state of SELinux on the system. # SELINUX= can take one of these three values: # enforcing - SELinux security policy is enforced. # permissive - SELinux prints warnings instead of enforcing. # disabled - No SELinux policy is loaded. SELINUX=disabled |
3. OS유저 생성, 환경 변수 설정, 권한 설정
Oracle을 사용 할 OS유저를 생성하고 패스워드 설정을 수행한다.
| [root@server1 ~]# groupadd dba [root@server1 ~]# useradd -g dba oracle [root@server1 ~]# passwd oracle |
Oracle을 설치할 디렉토리를 생성한 뒤 oracle 계정에 권한을 부여하여 준다.
| [root@server1 ~]# mkdir -p /app/oracle [root@server1 ~]# chown -R oracle:dba /app [root@server1 ~]# chmod -R 775 /app |
Oracle 계정으로 접속하여 Profile 설정을 진행한다.
| [root@server1 ~]# su - oracle [oracle@server1 ~]$ vi .bash_profile |
| .... /* 한글깨지지 않게 추가 */ export LANG=c /* 날짜포맷 지정 */ export NLS_DATE_FORMAT=yyyymmdd export ORACLE_BASE=/app/oracle export ORACLE_HOME=$ORACLE_BASE/product/11.2.0/db_1 export ORACLE_SID=orcl export NLS_LANG=AMERICAN_AMERICA.AL32UTF8 export LD_LIBRARY_PATH=$ORACLE_HOME/lib:/lib:/usr/lib:/usr/local/lib export PATH=$PATH:$ORACLE_HOME/bin # alias alias ss='sqlplus / as sysdba' |
4. ORACLE 설치
다운로드 받은 설치파일 압축을 해제한다.
| [oracle@server1 ~]$ unzip linux.x64_11gR2_database_1of2.zip [oracle@server1 ~]$ unzip linux.x64_11gR2_database_2of2.zip |
압축을 해제한 뒤 설치 디렉토리에서 실행한다.
| [root@server1 ~]# xhost + [root@server1 ~]# su - oracle [oracle@server1 ~]$ cd database [oracle@server1 database]$ ./runInstaller |
체크를 해제하고 Next

데이터베이스 소프트웨어만 설치하는것으로 설정한 뒤 Next
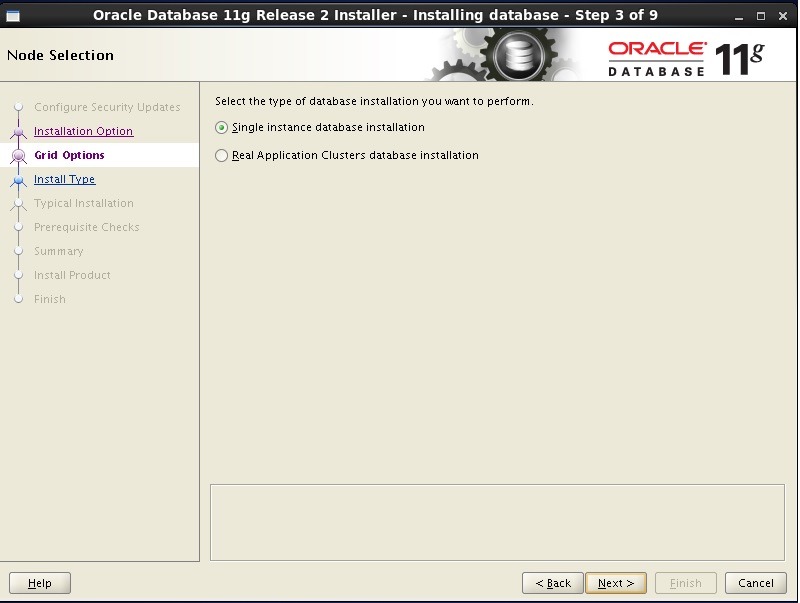
Single instance 설정 후 Next
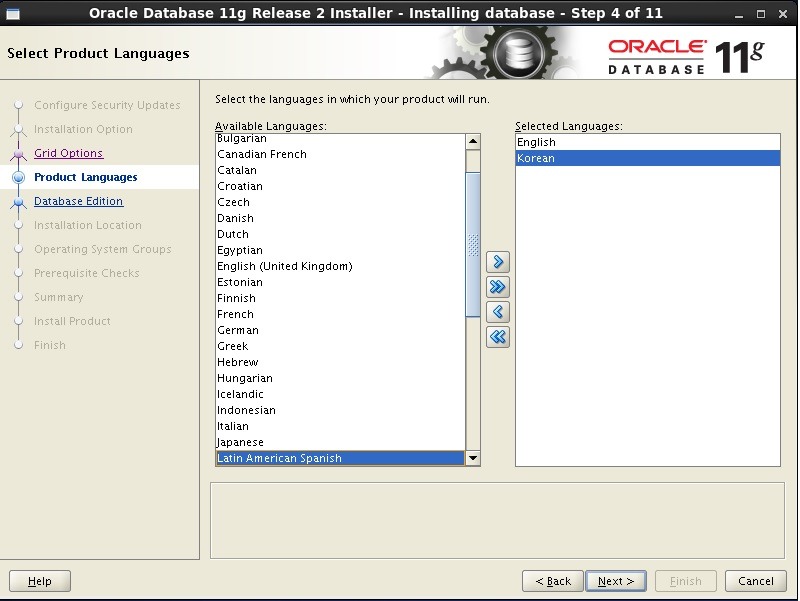
언어 선택 후 next
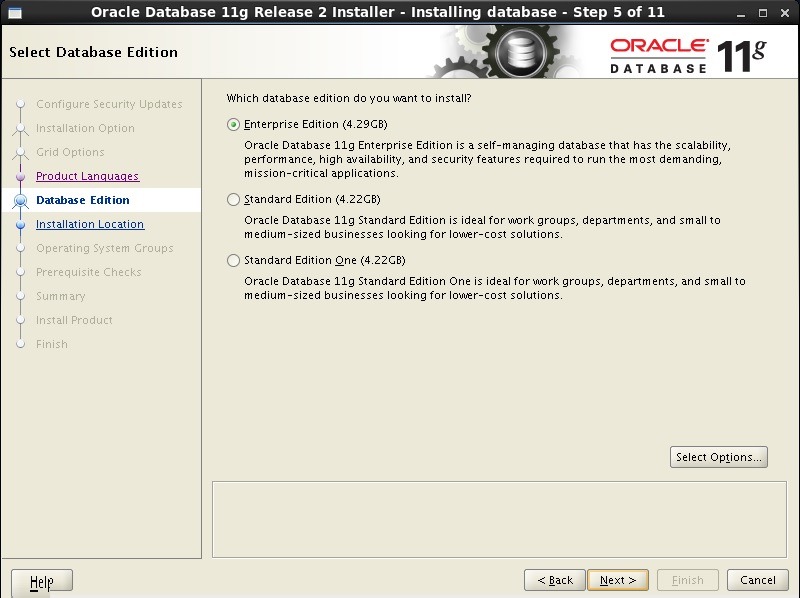
Enterprise Edition 선택 후 Next
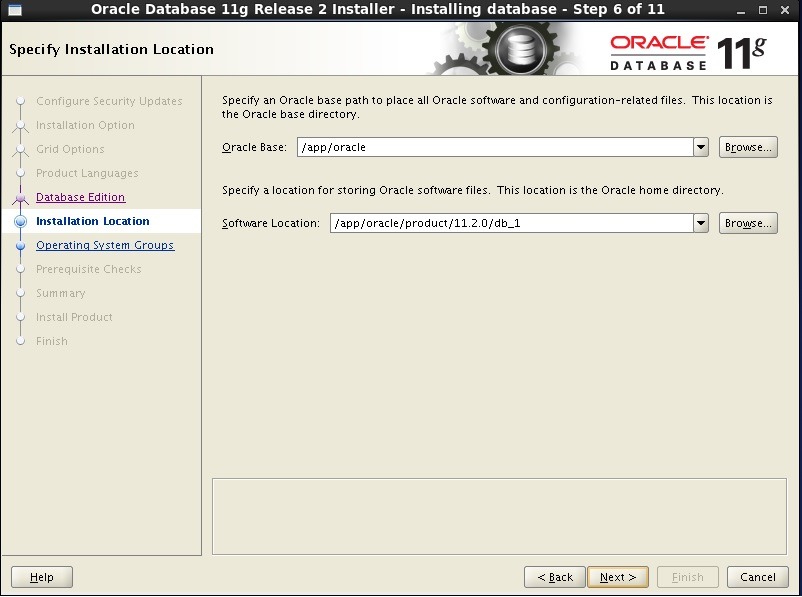
위에서 설정한 경로값 확인 후 Next
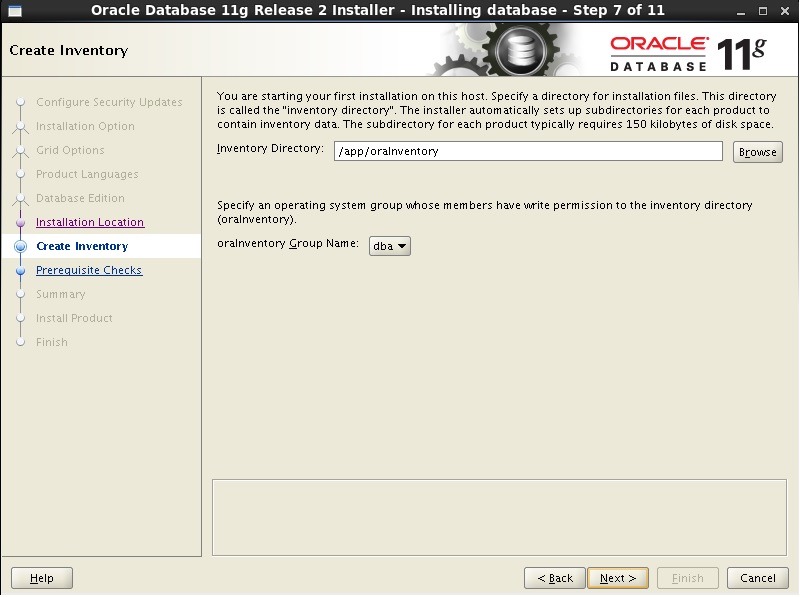
유저생성시 부여한 group과 Inventory 경로 확인 후 Next
그룹명 확인 후 Next

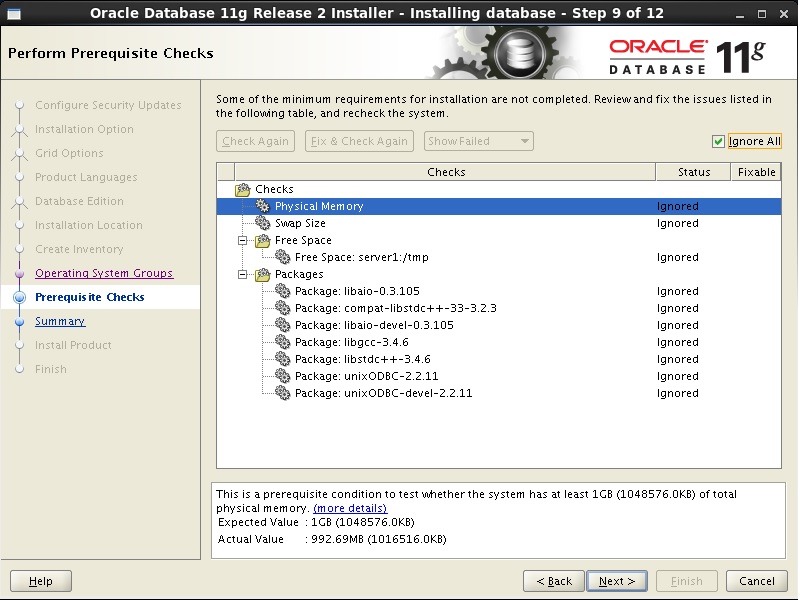
Ignore All 선택 후 Next
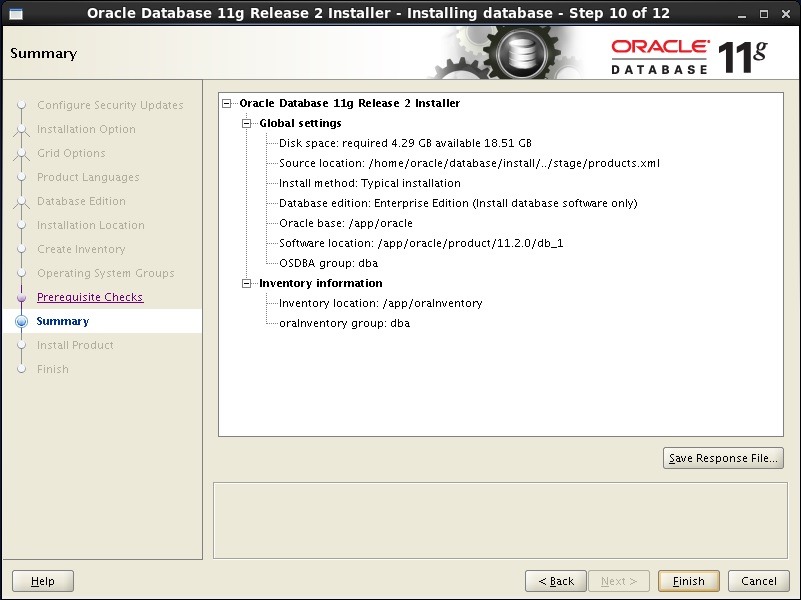
최종 설정 값 확인 후 Finish
아래와 같이 설치 진행
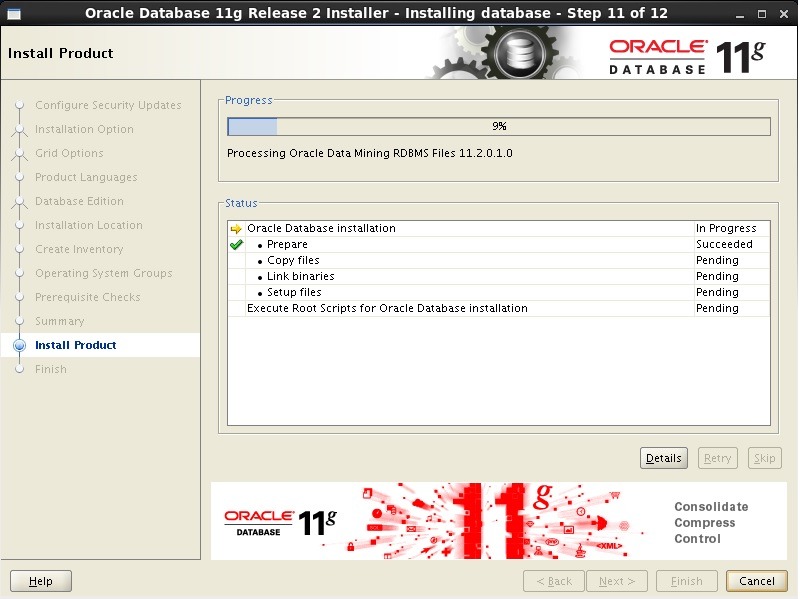
설치가 완료될 시점에 쉘스크립트 실행 안내창 뜸

해당 실행스크립트를 root 유저로 실행해준다.
| [root@server1 ~]# cd /app/oraInventory/ [root@server1 oraInventory]# sh orainstRoot.sh Changing permissions of /app/oraInventory. Adding read,write permissions for group. Removing read,write,execute permissions for world. Changing groupname of /app/oraInventory to dba. The execution of the script is complete. [root@server1 oraInventory]# cd /app/oracle/product/11.2.0/db_1 [root@server1 db_1]# sh root.sh Running Oracle 11g root.sh script... The following environment variables are set as: ORACLE_OWNER= oracle ORACLE_HOME= /app/oracle/product/11.2.0/db_1 Enter the full pathname of the local bin directory: [/usr/local/bin]: [ENTER] Copying dbhome to /usr/local/bin ... Copying oraenv to /usr/local/bin ... Copying coraenv to /usr/local/bin ... Creating /etc/oratab file... Entries will be added to the /etc/oratab file as needed by Database Configuration Assistant when a database is created Finished running generic part of root.sh script. Now product-specific root actions will be performed. Finished product-specific root actions. |
설치가 완료되면 유저 환경변수를 설정한다.
| [oracle@server1 ~]$ source ~/.bash_profile |
5. 리스너 생성
netca 명령어로 리스너를 생성한다.
| [oracle@server1 ~]$ netca |
Lister 생성 체크 후 Next

최초 구성이므로 Add 선택 후 Next

기본설정되있는 LISTENER 확인 후 Next

기본설정 확인 후 Next

1521 port(기본포트) 확인 후 Next

다른 리스너 추가 없으니 No 선택 후 Next

리스너 설정 완료

Finish로 창 종료

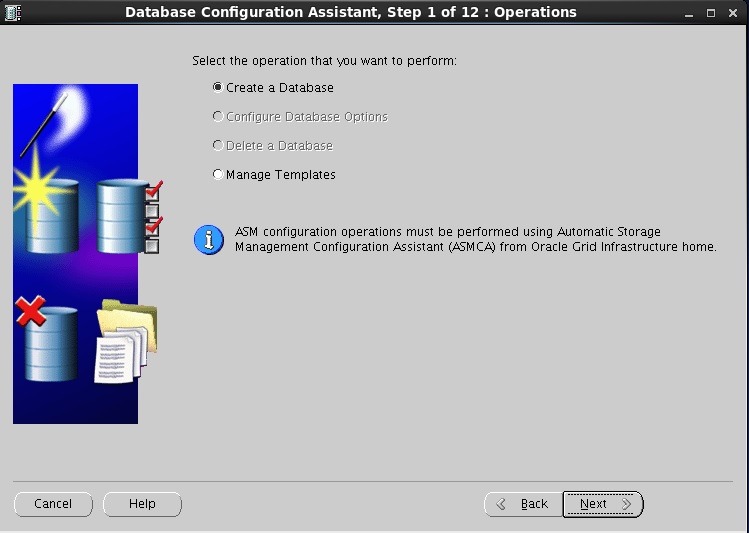
6. 데이터베이스 생성
dbca 명령어로 데이터베이스를 생성한다.
| [oracle@server1 ~]$ dbca |
데이터베이스 생성 시작 Next

데이터베이스 생성 선택 후 Next
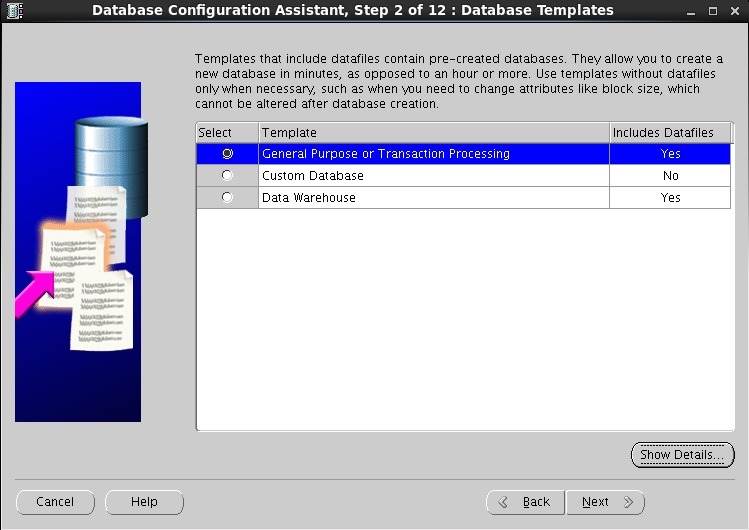
기본 설정 확인 후 Next
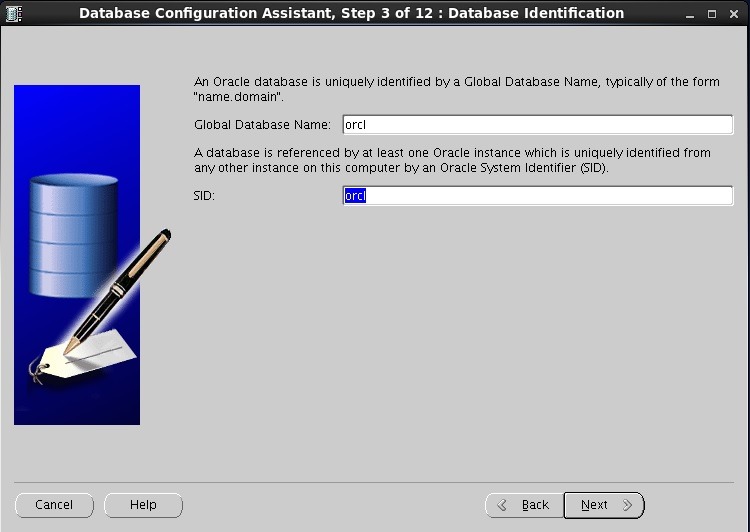
ORACLE SID 설정후 Next.
만약 SID를 변경하고 싶은 경우 .bash_profile 의 ORACLE_SID 값을 변경해주어야 한다.
체크 되어있는 대로 Next

아래 전체 계정에 동일 패스워드 사용 체크 후 패스워드 설정.
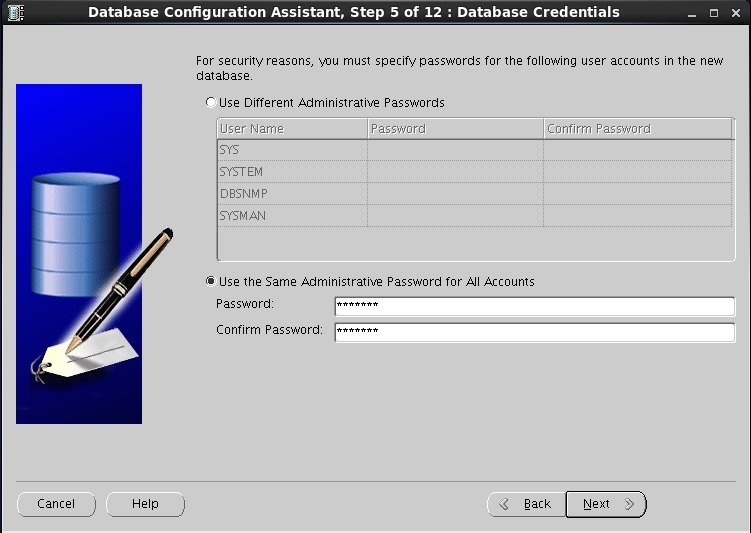
단순하게 패스워드 설정하면 뜨는 확인창. 무시하고 Yes로 넘어감

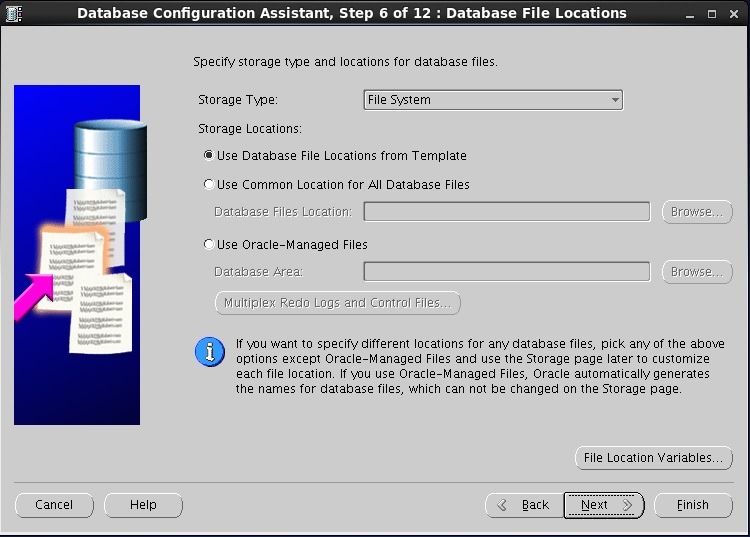
기본 설정된값 그대로 Next
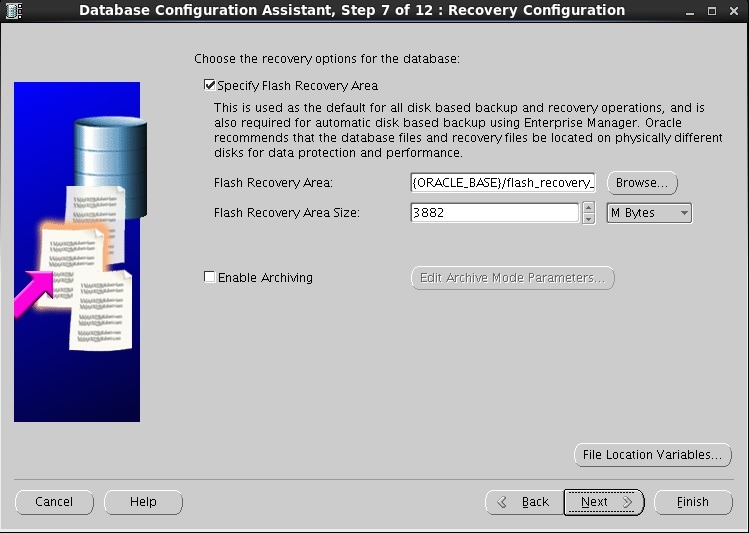
기본 설정된값 그대로 Next
기본 설정된값 그대로 Next

서버 Memory 사양에 따라 기본 설정된값 그대로 설정. Sizing 탭을 누른다.

기본 설정된값 놔두고 Character Sets 탭을 누른다

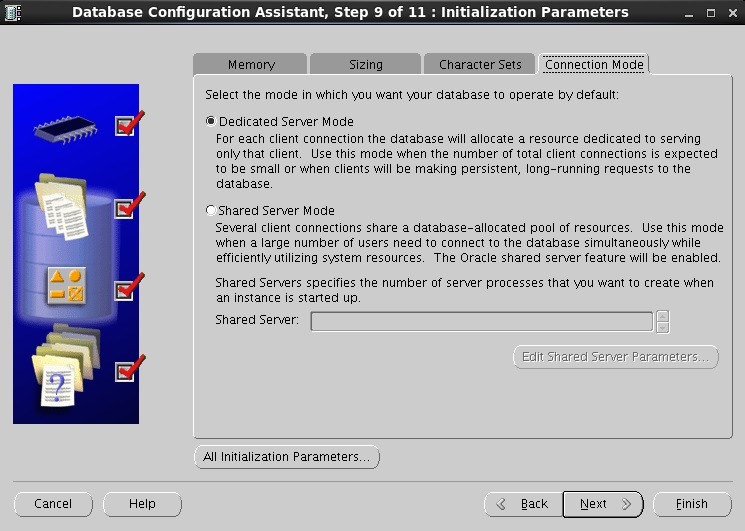
캐릭터셋 설정 후 connection mode 탭을 누른다

기본 설정된값 그대로 Next
설정된 값 확인 후 Next

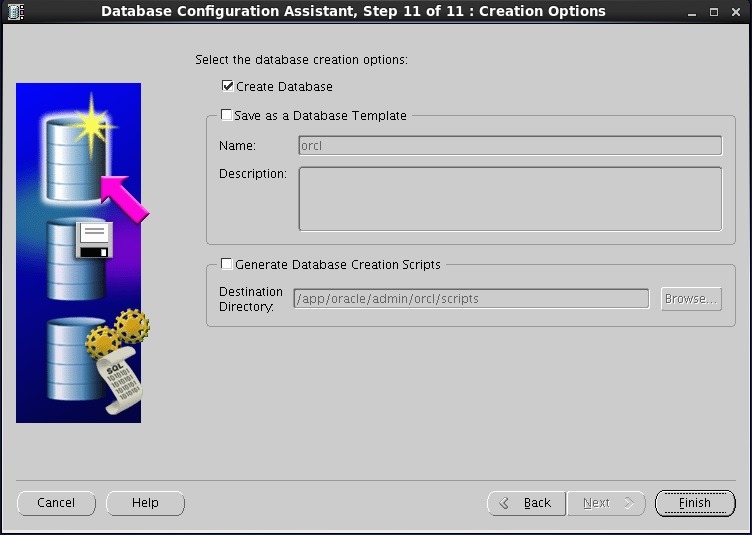
따로 변경할것 없이 Finish
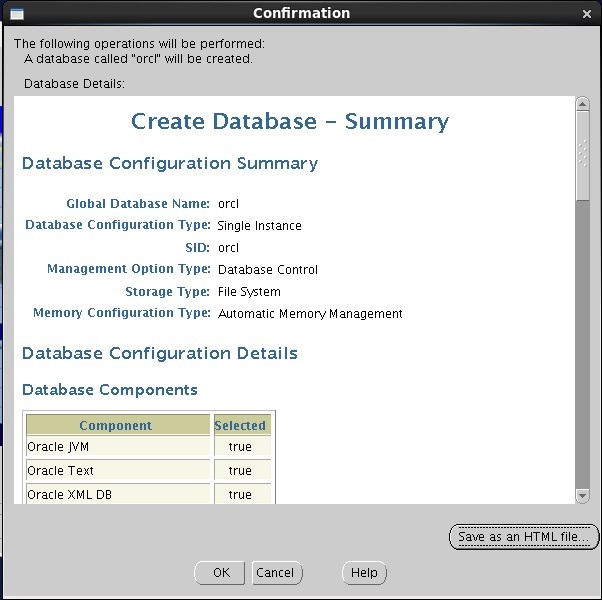
마지막 설치전 확인 후 OK
아래와 같이 설치가 진행됨

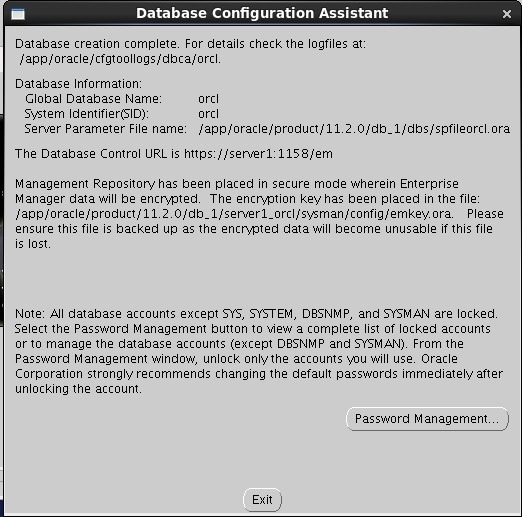
설치가 완료되면 아래와 같은 창이 나옴. 설치 완료
7. 데이터베이스 및 리스너 실행
환경변수에서 sysdba로 접속하는 alias를 줬기때문에 아래와 같이 접속하여 startup 한다.
| [oracle@server1 ~]$ ss SQL*Plus: Release 11.2.0.1.0 Production on Sat Nov 19 05:45:14 2016 Copyright (c) 1982, 2009, Oracle. All rights reserved. Connected to an idle instance. SQL> startup ORACLE instance started. Total System Global Area 413372416 bytes Fixed Size 2213896 bytes Variable Size 281020408 bytes Database Buffers 125829120 bytes Redo Buffers 4308992 bytes Database mounted. Database opened. |
리스너 기동 상태를 확인한다.
| . |
8. Oracle 정상 작동 및 버전 확인
설치시 설정한 값들과 버전 등을 확인해본다.
[PARAMETER 확인]
| SQL> column parameter format a30 SQL> column value format a30 SQL> select * from nls_database_parameters; PARAMETER VALUE ------------------------------ ------------------------------ NLS_LANGUAGE AMERICAN NLS_TERRITORY AMERICA NLS_CURRENCY $ NLS_ISO_CURRENCY AMERICA NLS_NUMERIC_CHARACTERS ., NLS_CHARACTERSET AL32UTF8 NLS_CALENDAR GREGORIAN NLS_DATE_FORMAT DD-MON-RR NLS_DATE_LANGUAGE AMERICAN NLS_SORT BINARY NLS_TIME_FORMAT HH.MI.SSXFF AM PARAMETER VALUE ------------------------------ ------------------------------ NLS_TIMESTAMP_FORMAT DD-MON-RR HH.MI.SSXFF AM NLS_TIME_TZ_FORMAT HH.MI.SSXFF AM TZR NLS_TIMESTAMP_TZ_FORMAT DD-MON-RR HH.MI.SSXFF AM TZR NLS_DUAL_CURRENCY $ NLS_COMP BINARY NLS_LENGTH_SEMANTICS BYTE NLS_NCHAR_CONV_EXCP FALSE NLS_NCHAR_CHARACTERSET UTF8 NLS_RDBMS_VERSION 11.2.0.1.0 |
[spfile, pfile 확인]
| SQL> show parameter spfile; NAME TYPE VALUE ------------------------------------ ---------------------- ------------------------------ spfile string /app/oracle/product/11.2.0/db_1/dbs/spfileorcl.ora |
[버전 확인]
| SQL> select * from v$version; BANNER ---------------------------------------------------------------------------------------------------------------------------------------------------------------- Oracle Database 11g Enterprise Edition Release 11.2.0.1.0 - 64bit Production PL/SQL Release 11.2.0.1.0 - Production CORE 11.2.0.1.0 Production TNS for Linux: Version 11.2.0.1.0 - Production NLSRTL Version 11.2.0.1.0 - Production |
'데이터베이스 > 오라클' 카테고리의 다른 글
| 윈도우 서버용 오라클 SID 수정 방법 (0) | 2021.09.09 |
|---|---|
| 리눅스 오라클 기동 (0) | 2021.09.09 |
| 오라클 sysdba export (0) | 2021.09.08 |
| 오라클 10g설치 (0) | 2021.09.08 |
| 사용자의 계정의 락(lock)을 해제한다. (0) | 2021.09.08 |


댓글